Custom NetSuite Workflows for High-Value Approvals
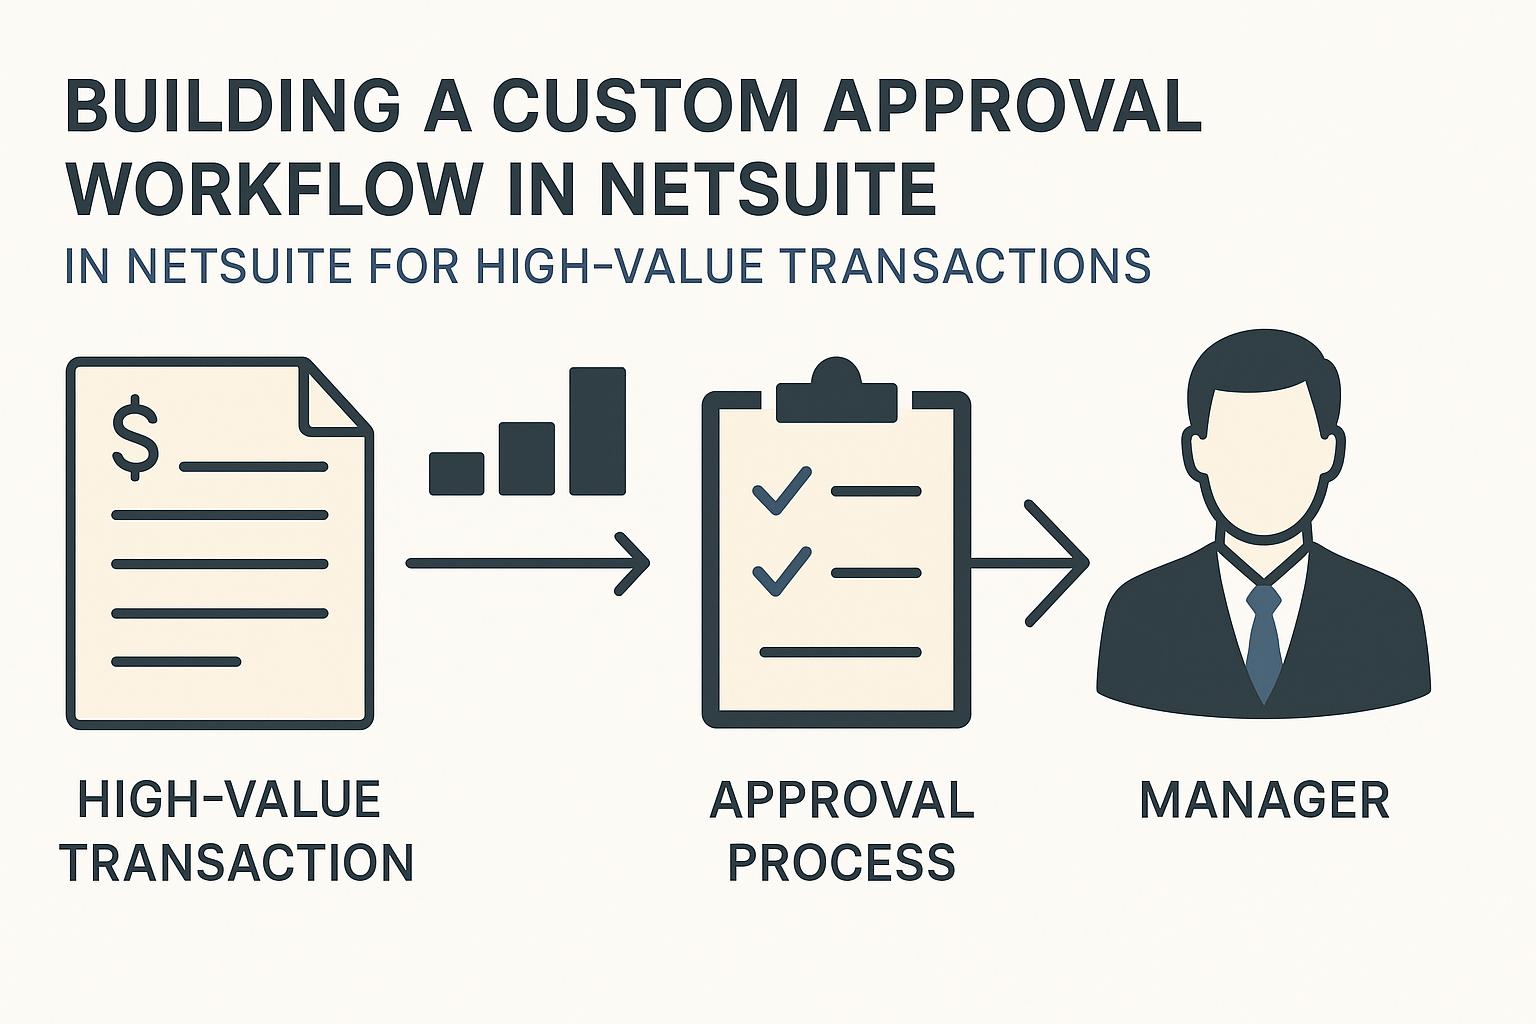
Building a Custom Approval Workflow in NetSuite for High-Value Transactions
High-value transactions – such as large purchase orders, significant vendor bills, or high-amount sales orders – carry greater financial risk and typically require robust oversight. In NetSuite, you can enforce this oversight by implementing custom approval workflows that ensure such transactions are reviewed and approved by the appropriate personnel before further processing. This comprehensive report provides an in-depth guide on building a custom approval workflow for high-value transactions in NetSuite, covering everything from defining what “high-value” means, to the business controls and technical tools involved, to step-by-step workflow construction and best practices for deployment. The content is tailored for NetSuite administrators, developers, and finance managers looking to strengthen financial controls through workflow automation.
Defining “High-Value Transactions” and Threshold Logic
High-Value Criteria: In an organizational context, high-value transactions are those exceeding a certain monetary threshold that warrants additional approval. The threshold can be a fixed amount (e.g. any transaction above $50,000) or dynamic based on employee roles and limits. NetSuite’s built-in Approval Routing feature, for example, uses employee-specific limits: each employee record can have a Purchase Limit or Expense Limit indicating the highest amount they can enter without approval[1]. If a transaction exceeds an employee’s limit, it triggers an approval process up the chain of command[2]. This encapsulates a core threshold logic: transactions above defined limits are flagged as “high-value” and require sign-off by a supervisor or higher authority.
Multi-Level Thresholds: Often, organizations set tiered thresholds to require different approval levels for progressively larger amounts. In NetSuite’s model, a transaction will cascade through multiple approvers until it reaches someone with a sufficient approval limit to cover the total amount[3]. For instance, a department manager might approve expenditures up to $10,000; anything beyond that might escalate to a director (say up to $50,000), and transactions above $50,000 go to the CFO. If no individual in the hierarchy has a limit high enough, the system alerts that additional approval authority is needed[2]. This dynamic routing ensures that higher-value transactions get additional eyes: a simple one-step approval may suffice for low-risk transactions, whereas high-value or sensitive records may require multi-stage approvals[4].
Defining Thresholds in Workflows: When building a custom workflow, you can implement threshold logic using conditions or formulae. For example, a workflow condition might check if Transaction Total > $X to determine if the “high-value approval” path should be followed. Alternatively, the workflow can leverage NetSuite’s existing Approval Limit fields on employee records (for purchase or expense approvals) to drive logic. In a multi-approver scenario, the workflow can compare the transaction amount to the current approver’s limit and decide whether to auto-approve or escalate: if the amount exceeds the current approver’s authorized limit, the workflow routes the transaction to the next approver in line[5]. This approach mirrors the standard approval routing: “If the employee enters a transaction over their limit, the transaction goes to a supervisor or approver with an approval limit high enough for the amount”[1]. By clearly defining what constitutes “high-value” and encoding those thresholds in your workflow, you lay the foundation for a controlled approval process.
Business Drivers and Risk Controls for Approval Workflows
Implementing approval workflows for high-value transactions is driven by critical business needs around governance, risk management, and compliance:
-
Oversight and Fraud Prevention: High-value transactions present a greater risk of error or fraud. Requiring approvals ensures that a person of authority reviews the transaction’s details and legitimacy. NetSuite’s approval processes are designed so that transactions are not processed until they are approved, providing oversight by allowing authorized approvers to reject or halt transactions that seem improper[6]. This oversight acts as a fraud deterrent and catches mistakes (e.g. an extra zero turning $10,000 into $100,000) before funds are committed.
-
Financial Control and Policy Compliance: Many organizations have spend policies that dictate who can approve what amount. Approval workflows enforce these delegation of authority policies automatically. This supports compliance with internal controls and external regulations (for example, Sarbanes-Oxley requirements for approving significant expenditures). By routing high-value deals to senior management, the company ensures large expenditures align with budgets and strategic priorities. One key control is establishing approval thresholds to allow routine purchases to be handled by mid-level managers while escalating only truly high-value expenditures to top executives[7]. This way, day-to-day operations aren’t bottlenecked, and executives are only involved when the spend is significant.
-
Risk Mitigation: Multi-level approval workflows distribute decision-making and enforce segregation of duties, which mitigates risk. For example, the person creating a purchase order should not be the sole approver if the amount is large – a higher-level review provides a check-and-balance. A high-value approval workflow inherently provides an audit trail of who reviewed and approved, which is crucial for accountability. NetSuite’s always-on audit trails (system notes) record changes such as status updates and approver field changes, creating a documented history for each approval.
-
Governance, Risk, and Compliance (GRC) Alignment: NetSuite’s capabilities can be harnessed to strengthen GRC objectives. By establishing approval workflows, organizations can map their business rules (like spending limits, project budget controls, etc.) into the system so that compliance is automated. These workflows act as preventative controls – preventing unauthorized commitments – and also facilitate easier audits since all approval actions are logged. For instance, any approval thresholds and rules can be configured such that only the necessary approvers are involved based on the scale of the transaction, streamlining compliance while ensuring nothing slips through un-reviewed[7].
-
Business Process Efficiency: While approvals are about control, a well-designed workflow also brings efficiency. Automated notifications and routing replace manual sign-offs (like paper trails or email threads), speeding up approvals without sacrificing control. The business driver here is to streamline approvals such that high-value transactions receive proper oversight with minimal delay, keeping operations flowing. In summary, the approval workflow is not just an IT mechanism, but a financial control tool that addresses risk (by adding checks for large sums) and ensures management visibility into significant commitments.
NetSuite Tools for Building Approval Workflows
NetSuite provides multiple tools and approaches to implement approval workflows, each with different strengths. The main options are SuiteFlow, SuiteScript, and the SuiteApprovals SuiteApp, in addition to the basic built-in approval routing feature. Understanding these tools will help you choose the right approach or combination for your needs:
-
SuiteFlow (Workflow Manager): SuiteFlow is NetSuite’s graphical workflow engine for creating custom workflows via a point-and-click interface. It is the go-to tool for building approval processes without needing to write code. SuiteFlow enables you to design states, transitions, and actions that define a business process like transaction approval[8]. For most standard and moderately complex approval scenarios—like routing based on amount, department, or subsidiary—SuiteFlow is the ideal tool. It is accessible to administrators and business analysts who may not have a development background.
-
SuiteScript: SuiteScript is NetSuite’s JavaScript-based scripting platform that offers maximum flexibility for highly complex or unique approval logic. If your approval rules involve lookups to custom records, integration with external systems for validation, or extremely dynamic approver assignments that go beyond what SuiteFlow can handle, SuiteScript is the answer. For example, a script could determine an approver based on a complex matrix of project type, location, and transaction amount. Scripting is best suited for developers and requires a deeper technical understanding of NetSuite’s architecture.
-
SuiteApprovals SuiteApp: SuiteApprovals is a free, managed SuiteApp from NetSuite that provides a pre-built, configurable framework for approval workflows. It offers a more structured and feature-rich starting point than building from scratch. The app includes an approval portlet for users, an approvals history log, and the ability to define rule-based approval routing for multiple transaction types. It often serves as a powerful middle ground, offering more features than basic routing and more structure than a fully custom SuiteFlow workflow, making it a good first choice for many organizations.th-SuiteFlow#:~:text=How%20SuiteFlow%20can%20help%20implement,NetSuite%20workflows%20for%20approvals. A workflow created in SuiteFlow can handle conditional logic (e.g. different paths for different amounts or departments), parallel or sequential approvals, and can automate actions such as sending emails or locking records. One advantage of SuiteFlow is flexibility: you can implement non-linear approvals or conditional routing that the out-of-the-box approval routing might not support[9]. For example, you could require non-sequential approvals or action from multiple specific employees at certain stages, show custom Approve/Reject buttons only for designated roles, or automatically send notifications based on context[9]. SuiteFlow’s user-friendly designer allows modification of the process as business needs change. Essentially, SuiteFlow creates a custom business process for a record in NetSuite, covering use cases from transaction approvals to lead nurturing[10]. Note: To use SuiteFlow, it must be enabled in your account (via Enable Features in the SuiteCloud subtab)[11].
-
SuiteScript: SuiteScript is NetSuite’s scripting platform (Javascript-based) that allows developers to code custom business logic. While SuiteFlow covers most approval needs via configuration, SuiteScript might be employed for more complex scenarios beyond SuiteFlow’s declarative capabilities. For example, if you need to perform complex computations or cross-record validations to determine approval requirements, a beforeSubmit user event script or a SuiteScript Workflow Action could be used in tandem with SuiteFlow. SuiteScript can also be used to create custom approval behaviors – for instance, automatically creating a task record for approvers or integrating with external systems for approval notifications. Generally, SuiteScript provides fine-grained control and can extend a SuiteFlow workflow (SuiteFlow can trigger custom scripts as actions). However, using SuiteScript requires developer skills and thorough testing, so it’s usually reserved for cases where the built-in SuiteFlow actions aren’t sufficient.
-
Built-in Approval Routing Feature: NetSuite has a standard approval routing mechanism (without using SuiteFlow) for certain transaction types like purchase orders, expense reports, vendor bills, etc. This feature relies on fields in employee records (Supervisor, Purchase Limit, Approval Limit, etc.) to auto-route transactions up a supervisor hierarchy[12][1]. When enabled (via Setup > Accounting > Accounting Preferences > Approval Routing for the transaction type), any new transaction starts in a “Pending Approval” status and the system automatically assigns the next approver (usually the employee’s supervisor or designated approver) until someone in the chain has a high enough limit to approve[2]. The standard routing is simple to enable and works well for linear hierarchies; however, it may not cover complex conditional rules (for example, different workflows by department or requiring multiple parallel approvals). In those cases, you can switch to a custom SuiteFlow-based approval for more flexibility[9][13]. In fact, NetSuite allows turning off the built-in routing for a transaction type so that a custom workflow can take over[14]. Many companies start with the standard routing and later migrate to SuiteFlow for customization[15].
-
SuiteApprovals SuiteApp (Advanced Approvals): SuiteApprovals is a NetSuite SuiteApp (bundle) provided by Oracle-NetSuite that delivers a configurable framework for managing approvals across various record types. This SuiteApp (also referred to as Advanced Approvals) provides a more advanced UI on top of SuiteFlow – it comes with predefined workflows and an Approval Rules engine that admins can configure without building from scratch. SuiteApprovals supports multiple record types (Journal Entries, POs, Requisitions, Expense Reports, Sales Orders, Vendor Bills, etc.) and even allows email-based approvals[16]. With SuiteApprovals installed, you gain customizable properties to ensure only authorized individuals can edit, approve, reject, or resubmit records for approval[17]. You can define multi-level approval rules with specific criteria (for example, amount thresholds, departments, classes) and hierarchical chains through a visual interface. It also introduces an Approval History subtab on records for audit purposes (listing each approval action, who performed it, and when)[18]. Notably, SuiteApprovals allows email approvals – approvers can receive an email and approve/reject directly via email response or a link, with secure tracking of these actions[19]. This is useful for approvers who may not log in to NetSuite frequently. Essentially, SuiteApprovals leverages SuiteFlow under the hood but provides a standardized, easier-to-deploy solution for common approval scenarios. It’s ideal if you want a robust solution quickly, though it may have some limitations in ultra-complex scenarios. (Originally, SuiteApprovals was part of the “SuiteSolutions Advanced Approvals” bundle which NetSuite made available free to customers in recent years[20].)
-
Other Tools and Third-Party Solutions: Beyond NetSuite’s native options, there are third-party SuiteApps (e.g., ZoneApprovals by Zone&Co, or procurement systems like Procurify) that can integrate with NetSuite to manage approvals. These can add features like advanced budgeting, approval via mobile apps, etc. However, in this report we focus on NetSuite’s native or built-in solutions.
Choosing the Approach: In many cases, a combination of these tools is used. For example, you might use SuiteFlow to build the core workflow and incorporate a SuiteScript action for a particularly complex condition (like looking up a custom approval matrix). If your needs align well with SuiteApprovals’ capabilities and you want the convenience of email approvals and built-in history tracking, consider installing that SuiteApp[17]. On the other hand, if you require a highly tailored process (e.g., conditional logic that SuiteApprovals can’t configure), custom SuiteFlow gives you full control. No matter the approach, NetSuite’s platform ensures that any approval workflow can still update key fields like Approval Status and Next Approver, which tie into NetSuite’s UI (such as the Employee Center reminders for “Transactions to Approve”[21]). In the next section, we dive into how to build a custom approval workflow using SuiteFlow, which is the most direct way to implement a bespoke approval process for high-value transactions.
Step-by-Step: Building a Custom Approval Workflow with SuiteFlow
In this section, we will walk through the process of creating a custom approval workflow for high-value transactions using SuiteFlow. As an example, consider designing an approval workflow for Purchase Orders (POs) above a certain amount, requiring multi-level approvals. The same principles apply to other transaction types (sales orders, vendor bills, etc.). We will assume the SuiteFlow feature is already enabled in your NetSuite account (if not, an Administrator should go to Setup > Company > Enable Features > SuiteCloud and enable SuiteFlow[11]). We will also assume that the Approval Routing preference for the transaction is enabled if we plan to use the native “Approval Status” field and “Next Approver” on the record[22] (for POs, this is the Purchase Order checkbox under Approval Routing in Accounting Preferences). Enabling that preference ensures new POs default to a “Pending Approval” status and exposes the Next Approver field, which our custom workflow can leverage[23].
1. Plan the Workflow Structure: Before clicking into NetSuite’s Workflow tool, define your requirements clearly. Determine the approval levels, criteria, and actions. For example: “Any PO over $50,000 requires two approvals: first by the Purchasing Manager, then by the CFO. POs $50,000 or below require only the Purchasing Manager’s approval. The requestor’s direct supervisor approves POs below $5,000 (if within their limit), otherwise it goes to Purchasing. Rejections should notify the requester with a reason and allow resubmission.” Laying out these rules in a table or flowchart is a best practice. If you cannot clearly articulate the rules (e.g., in a spreadsheet matrix), you’ll likely struggle to implement them in the workflow[24]. So clarify questions like: Who are the approvers for each threshold? Does department or subsidiary affect the routing? Can an approver delegate or override? What happens if an approver is on vacation or if the transaction is urgent? (We will address delegation and overrides later as well.) Having this blueprint will guide the actual SuiteFlow configuration.
2. Create a New Workflow: In NetSuite, navigate to Customization > Workflow > Workflows > New. This opens the Workflow Editor where you’ll define the approval process. On the workflow definition page, fill out the basic properties:
-
Name: e.g. “High-Value PO Approval Workflow”.
-
Record Type: Choose the base transaction type (e.g. Transaction → Purchase Order if it’s specifically for POs). If this workflow will cover multiple transaction types (less common), you might use a more generic record type with conditions, but typically you create one per type.
-
Sub Types: You can narrow this to specific subtypes if needed (for instance, only apply to Standard POs vs. Drop-Ship POs, etc., or leave as “All” for all POs).
-
Initiation: Select Event Based – meaning the workflow will trigger on record events (like create or edit). For approvals, event-based is typical. We will specify the exact trigger in a moment.
-
Trigger Type: Often for approvals we use Before Record Submit or After Record Submit to initiate logic right after the record is created. Using “Before Submit” allows us to potentially set some fields (like marking status as pending) before the record is saved. (NetSuite’s sample uses Before Submit for initial actions[25]).
-
Release Status: Set this to Testing initially[26][27]. This ensures the workflow is not fully active for all users until we’re done testing. In Testing mode, only users with the Enable Workflows permission (often Administrators) will trigger it. We’ll change it to Released once it’s fully configured and tested.
-
Owner: Typically an admin user; it defaults to the creator. Owner mainly matters if using some specific contexts, but we can leave it as admin.
-
Save the workflow record.
At this point, you have a blank workflow shell. The next steps will be to add states, actions, and transitions that make up the approval logic.
3. Define Workflow Initiation and Entry Conditions: Still on the main workflow properties screen, you can define when the workflow should start. Under Initiation, choose the events that will trigger the workflow. For an approval workflow:
-
We likely want it to trigger On Create (when a new transaction is entered) – this is when a record would enter the “Pending Approval” process.
-
We also may want to trigger On Edit in certain cases – for example, if an approved transaction is edited (especially if a material field like amount is changed), you might want to re-initiate an approval process. This can be handled via conditions in the workflow to reset status and require re-approval on significant edits. For simplicity, you might start with only On Create, and handle edits conditionally within the workflow (more on that in pitfalls/best practices).
-
Set Trigger Type accordingly (if using Before Submit or After Submit). If you set the workflow to trigger On Create/On Edit, NetSuite will initiate a workflow instance for those events.
Next, consider if there are any entry conditions for the workflow. For example, you might only want to run the workflow if the transaction amount is above a threshold (since we don’t need approval for small POs). You can add a Workflow Condition at the definition level (or in the entry state) such as: Amount “greater than” 5000. In SuiteFlow, this can be set by selecting the field (like Total or Amount) and the value. If the condition is not met, the workflow won’t even initiate. Alternatively, you can initiate for all and within the workflow immediately auto-approve lower amounts. The design choice depends on whether you want all records to go through a standard approval status flow or bypass it entirely if not needed. For clarity, let’s assume we want all POs to start as Pending Approval (NetSuite does this by default when Approval Routing is on[23]), and we will programmatically auto-approve those under the threshold. So, we may not need an overall condition, or we set a condition that the record’s Approval Status is “Pending Approval” to ensure we don’t run on already-approved records. (NetSuite’s sample for estimate approvals first sets a custom approval status field to Pending to mark entry into workflow[28]).
4. Design Workflow States: Now, add the various states the record will flow through during the approval process. Each state represents a step or stage in the approval. For a high-value transaction approval, common states include:
-
Entry (Initialization) State: A starting point when the record is first saved. Often used to initialize fields or decide which approval path to take.
-
Pending Approval (Manager) – first approver’s stage.
-
Pending Approval (Executive) – second approver’s stage (if needed, for high amounts).
-
Approved (Final) – an end state representing that approval is complete.
-
Rejected – an end state for when the transaction is rejected.
In SuiteFlow, when you create a new state, you give it a name and then you’ll be able to add actions and transitions within that state. Let’s flesh out example states:
-
State 1: Entry – “Submit for Approval”: This could be a transient state that runs immediately after the record is created. In it, you might set some field values. For instance, if you created a custom field or you’re using the standard Approval Status field, set it to “Pending Approval” at this point (if not already set by default). In the NetSuite estimate approval sample, the entry state uses a Set Field Value action to mark the record’s approval status as Pending Approval[28]. You might also assign the initial Next Approver in this state if logic can determine it (e.g., set Next Approver = requester’s supervisor for the first level). However, if using multiple levels, it can be easier to set Next Approver dynamically in each stage. After actions, this Entry state should immediately transition the record into the appropriate next state. You’ll configure a Transition out of Entry: for example, if the record needs approval, transition to the “Pending Approval” state; if no approval is needed (maybe amount is below threshold or the user has sufficient self-approval limit), transition directly to Approved.
Conditional Transition Example: If the transaction amount is above $5,000 (our threshold for requiring manager approval), go to State 2: Pending Approval. If amount is $5,000 or below, go to State 3: Approved automatically. In NetSuite’s sample, they did a similar check: if the sales rep has a supervisor, go to Pending Approval state; if not, go straight to Approved[29]. This ensured that if there was no one to approve (no supervisor), the estimate auto-approved[30]. In our case, the condition is monetary rather than the existence of a supervisor, but the concept is the same.
-
State 2: “Pending Approval – Manager”: In this state, the transaction is awaiting approval from a manager (or first-level approver). Key things to configure here:
-
Approval Buttons: Add actions to create an “Approve” button and a “Reject” button on the record form for the approver[31]. SuiteFlow’s Add Button action allows you to place custom buttons on the record when it’s in this state. Typically, you would label them “Approve” and “Reject” for clarity. You can also restrict these buttons to certain roles or users – in fact, you should, so that only the intended approver sees them. For instance, set a condition on the Add Button action such that it only executes if the current viewer is the designated approver or has an approver role. In a simple case, you might restrict by role (e.g., only users with the Manager role see the buttons), or by comparing the current user to a “Next Approver” field on the record. NetSuite’s example shows “the Approve and Reject buttons are only added if the Supervisor for the sales rep views the record”[32]. This was achieved by a condition on the button actions checking that the viewer is the supervisor. You’ll similarly ensure the right person sees the buttons (to prevent unauthorized self-approval).
-
Lock Record: While in pending approval, it’s wise to prevent the requester or others from editing the record (which could alter what is being approved). Use the Lock Record action in this state to remove the Edit option and lock the record from changes[33]. This ensures the transaction details can’t be modified until a decision is made. (NetSuite’s logs show they executed Lock Record on the Before Load trigger in the pending approval state[32], meaning every time the record is loaded in that state, it’s locked for editing). The Lock Record action simply removes the Edit button for all users while in that state, effectively making it read-only to everyone except administrators[33]. This is crucial for integrity: it forces that any change (like increasing the amount) after submission would either require restarting the approval or be blocked until approval is completed.
-
Transition on Approve: Set up a transition that moves the record to the next state when the Approve button is clicked. In SuiteFlow, when you add an Approve button, you specify what action happens on click – typically a state transition. For example, “on button click ‘Approve’, transition to State 3: Executive Approval or Approved (depending on logic).” In our scenario, suppose our rule is that if amount > $50,000, a second approval is required by the CFO; if ≤ $50,000, the manager’s approval is final. We can handle this with either two separate transitions from this state or a single transition with a condition. One approach:
-
Transition 1: Approve -> State 3: Executive Approval, with condition “Amount > 50000”.
-
Transition 2: Approve -> State 4: Approved (Final), with condition “Amount ≤ 50000”.
-
Only one of those will execute based on the amount. (If using the supervisor limit approach, you might check current approver’s limit vs amount, as in the Travel Request example where “if the estimated cost exceeds the current approver’s allowed limit, transition to Next Approver state; otherwise, transition to Approved”[5].)
-
Transition on Reject: Likewise, configure the Reject button to transition to the Rejected state (we’ll define that state soon). Typically, any reject, regardless of amount, goes to a common Rejected state, so no complex condition needed except the button trigger itself.
-
-
Set Next Approver for Level 2: If the record needs a second approval, you should set up who that next approver is. This can be done either in this state before transitioning or in the next state’s entry. For example, if the manager approves and the amount is > $50k, we know we need CFO approval next. If you have a field on the record for Next Approver (NetSuite does have a standard Next Approver field on transactions when approval routing is enabled), you could use a Set Field Value action upon the manager’s approval to populate “Next Approver = CFO” (perhaps by role or explicitly selecting the CFO user). Another design is to determine the next approver within the State 3 logic instead. We will assume for clarity that we explicitly set Next Approver = CFO as soon as the manager approves a >$50k PO.
-
After configuring these actions and transitions, save the state.
-
-
State 3: “Pending Approval – Executive (CFO)” (this state is only entered for very high-value transactions above our second threshold):
-
This state will look similar to the prior state, but for the CFO. Add an Approve button and Reject button here as well. These should be restricted to the CFO or someone in an executive approver role. (If we set Next Approver field to CFO earlier, we can condition the Add Button actions here to
Next Approver == Current Userto ensure only that person sees them). -
Lock Record action should also be in effect here (the record would still be locked from before; we ensure it remains locked in this state too by having Lock Record action here as well[34]).
-
Transition on Approve: If the CFO clicks Approve, transition to the final Approved state.
-
Transition on Reject: If CFO rejects, transition to Rejected state.
-
Since this is presumably the final approver, we don’t have further conditional branches from here – it either gets approved (done) or rejected (done).
-
Save the state.
-
-
State 4: “Approved (Final)” – an end state indicating the transaction has been fully approved.
-
In this state, use Set Field Value to update the record’s status to “Approved”[35] (assuming we’re using a field to track approval status). For standard transaction types like POs, NetSuite has a built-in Approval Status field (which is a list, often with values like Pending Approval, Approved, Rejected). We want to set that to “Approved”. NetSuite’s sample did exactly this in their Approved state: “Set the Approval Status field to Approved”[35].
-
We also might clear the Next Approver field (set it to null) since the approval is completed, or set a custom field like “Approved By” with the approver’s name. In some cases, the system might handle clearing Next Approver once status is Approved, but in a custom workflow you might do it manually for clarity.
-
Send Email Notification: This is a crucial action – typically you’d send a notification to interested parties that the transaction is fully approved. At minimum, send an email to the originator (the employee who entered the transaction) to inform them their request has been approved[35]. You could also CC others (like the approver’s assistant or a shared inbox). SuiteFlow’s Send Email action lets you specify recipients dynamically, such as “Record Creator” or fields like “Employee” on the transaction. The email can include a message and even the transaction details or a link. (You can use template strings to insert the record URL or fields into the email body.) In our example, after final approval, we email the PO requester: “Your Purchase Order #1234 has been approved by CFO.”
-
Since this is an end state, we do not configure any outbound transitions (no further state to go to). The record will remain in this state (approved) unless edited (which could potentially restart a workflow instance if configured to do so, but normally once final, the workflow instance ends).
-
Save the state.
-
-
State 5: “Rejected” – an end state for rejected transactions.
-
Use Set Field Value to mark the record’s Approval Status as “Rejected”[36]. This way it’s clearly flagged in the system as not approved.
-
Send Email Notification: Send an email to the requester (and possibly their supervisor or others) notifying that the transaction was rejected[36]. It’s good to include any rejection reason or next steps. Out of the box, a simple workflow might not capture rejection reason unless you prompt for it. One best practice is to allow approvers to provide a reason when rejecting (we discuss this in best practices, e.g., via a custom field or comment). If such a field (say Rejection Reason) is available, include its value or instruct the approver to fill it before clicking reject.
-
No outbound transitions (end state). After rejection, the record might be left in the system for reference or editing. Often, if a transaction is rejected, the requester can edit it and resubmit. You may design the workflow such that if a rejected record is edited (perhaps setting it back to pending approval), the workflow can restart. Implementing that might involve resetting the Approval Status to Pending and clearing old approvers, which can be done via script or a new workflow instance on edit.
-
Save the state.
-
Figure: Example multi-stage approval workflow diagram (conceptual). This sample flow (in NetSuite’s SuiteFlow) illustrates an approval process where a transaction enters a pending approval state, allows an approver to either approve (leading to next level or final approval) or reject (ending the process), and uses conditions to route high-value transactions to additional approval levels.
Explanation: In the figure above, the initial “Entry” state sets the transaction to Pending Approval and routes it appropriately. If the amount is high (a “Yes” condition), it goes to a Manager Approval state, and if even higher, onward to an Executive Approval state, before reaching the Approved end state. A Reject action at any stage leads to the Rejected end state. This kind of branching logic is achieved via transitions with conditions in SuiteFlow.
5. Configure State Transitions in Detail: We touched on transitions while defining states, but to summarize: in SuiteFlow, each transition connects a source state to a destination state, optionally with a triggering event and condition. In our workflow:
-
The transition from Entry to Pending Approval (Manager) is triggered after record submit (i.e., on entry into the workflow) and has the condition that the transaction requires manager review (in our case, likely always if a supervisor exists or if using threshold, Amount > $5k). NetSuite’s sample used “Transition to Pending Approval if the record has a supervisor”[29]. We can analogously use “if Amount > 5000” or simply always go to Pending since all POs require at least one approval in our design.
-
The transition from Entry directly to Approved (bypassing approvals) would have the opposite condition (if any). For example, if we wanted to auto-approve trivial amounts, we’d have a branch “if Amount <= 5000, go to Approved”. Or if an employee’s own limit covers it (in a more dynamic design, you could check if the creator’s Purchase Limit >= amount, then auto-approve).
-
Within Pending Approval (Manager), the Approve button triggers a transition. In SuiteFlow this is often set by making the transition’s Trigger On = “Button” and specifying which button (Approve) it ties to. You also specify condition if any. We had two transitions for Approve: one to Executive Approval (condition: amount > $50k) and one to Approved (condition: amount ≤ $50k). Only the appropriate one will execute because transitions from the same state are evaluated in order – typically you’d put the more specific condition first.
-
The Reject button in Manager state triggers a transition to Rejected state (no additional condition needed except the button trigger).
-
In Executive Approval state, the Approve button trigger goes to Approved (final), and Reject goes to Rejected.
-
Approved and Rejected are terminal; no outgoing transitions.
Pay special attention to configuring the Trigger Timing for transitions. For example, the transition out of Entry might be configured as Trigger On: After Record Submit (so that it moves immediately after the record is saved). The transitions tied to buttons will typically be Trigger On: Button, which means they fire when that custom button is clicked. Ensure the button names in the transition settings exactly match the ones added by the Add Button action. (Often, SuiteFlow links them behind the scenes when you create an “Approve” transition and an “Approve” button in the state.)
Also note, transitions can have no trigger (trigger = blank), which means they are evaluated whenever the condition is true. This is useful for dynamic branching within a state that doesn’t depend on a specific event but on a condition becoming true. For instance, an alternate design for multi-approver: you could have a state “Evaluate Approval Limit” that on entering checks if Current Approver’s limit >= amount – if yes, transition to Approved; if not, transition to Next Approver state – using blank trigger so it evaluates immediately[5]. Blank trigger transitions will execute as soon as the state is entered and the condition holds, effectively acting as an immediate decision fork.
6. Implement Actions for Notifications and Record Updates: We already integrated some actions (Set Field Value, Send Email, etc.) in the state descriptions, but to recap key actions:
-
Set Field Value (Approval Status): Use this at appropriate points to keep the record’s status in sync. When the workflow starts, ensure the record shows as “Pending Approval”. When approved or rejected, update accordingly[35][36]. If you use NetSuite’s built-in Approval Status field, updating it will also reflect in the UI (and it’s what controls if a transaction can proceed to next steps like being billed or fulfilled, in some cases). Make sure the field is editable by the workflow (if using standard field and you have enabled the preference, it should be).
-
Set Field Value (Next Approver): At various points, set the Next Approver field on the record to indicate who currently should take action. For example, when entering the Manager Approval state, you might set Next Approver = that manager’s internal ID (NetSuite can default this if you have the Purchase Approver on the employee record of the requester[37], but in custom flows you might manage it). When moving to Executive approval, set Next Approver = CFO. Keeping this field updated allows NetSuite’s Employee Center to list the transaction in that approver’s “To Approve” queue[38], and also provides visibility on the record as to who is expected to act next.
-
Add Button (Approve/Reject): We described these in the Pending states. Use meaningful labels and restrict their visibility. (NetSuite even allows adding multiple different approval buttons if needed – e.g., “Approve $50K Only” vs “Approve Full” – but typically one is enough with the logic handled behind the scenes).
-
Send Email: Leverage this action after important events:
-
After each approval, perhaps send an email to the next approver (“A purchase order has been approved by Manager X and is awaiting your approval” – though if the next approver is logging in regularly, the Employee Center reminder might suffice).
-
After final approval, send confirmation to requester and maybe procurement staff.
-
After rejection, notify the requester with reasons. You can include record links in emails – a common technique is using the
${recordUrl}or a formula in the message to build a direct link to the record in NetSuite for convenience. -
NetSuite’s built-in suggestion is to include links that allow the approver to “drill down to the record for approval” in the email[39]. Indeed, you can include the record’s internal URL so that the email acts as a prompt for the approver to click, login, and approve.
-
-
Lock Record: As noted, add this action in any state where the record should be non-editable (Pending states). The NetSuite guideline is to use Lock Record on Before Record Load triggers so that it takes effect as the form loads[40]. We saw that even if a user has edit permission, once the workflow locks it, if they try to edit, the record opens in view-only mode (the Edit button is removed)[33][41].
-
Workflow fields (if needed): Sometimes you might define a custom Workflow field (a field local to the workflow instance) to hold data like “Current Approver’s Role” or “Approval Count”. This is more advanced, but an example is tracking an “Approval Sequence” number to identify if a record has been approved how many times. However, in our scenario we rely on record fields and conditions.
7. Set Up Alternate Paths or Edge Conditions: Think about any edge cases in the workflow:
-
No Approver Available: What if, for example, the requester’s supervisor field is empty (no manager)? In NetSuite’s standard logic, if no approver is found with enough authority, the system throws an alert on the transaction and it can’t proceed[42]. In a custom workflow, you should handle this. We saw an example in the Estimate workflow: if the sales rep had no supervisor, they auto-approved the quote[30] (since there was no one to approve, the workflow marked it Approved). For high-value POs, perhaps every employee will have an approver defined. But consider scenarios like the CEO entering a PO – CEO has no supervisor, so either designate an alternate (like board member) or allow auto-approval by CEO for any amount. You can implement a rule in the Entry state: if current employee has no approver (or is CEO role), auto-approve the transaction. This prevents a dead-end. Always ensure every possible path leads to either Approved or Rejected.
-
Delegation: If using SuiteApprovals SuiteApp or the Standard routing, there are features for alternate approvers (e.g., on the employee record you can specify an Alternate Approver to act when someone is unavailable)[43]. In a pure custom workflow, you might implement a “delegation” by allowing certain roles to approve on someone’s behalf. For example, you could permit that if an approver is out, a user with an “Approval Proxy” role could also see the buttons. This can be done via role conditions on the button actions (e.g., show Approve button to Role = CFO or Role = Controller as backup). Planning for out-of-office scenarios improves resilience of the workflow (we’ll discuss more in Pitfalls/Best Practices).
-
Parallel Approvals: Our example was sequential (one after another). If your business case requires parallel approvals (two different departments must approve independently), SuiteFlow can handle that by having two branches in parallel states. For instance, after Entry, you could transition into two states simultaneously (SuiteFlow supports multiple active states if they’re not connected linearly). Each could wait for an approval (say one from Finance, one from IT for a capital expenditure). Then you’d need to join them (perhaps with each setting a flag and a subsequent state waits until both flags are true). Parallel approvals get complex, but they are achievable with careful state design or by using the SuiteApprovals SuiteApp’s “Parallel Approvers” feature (which allows multiple approvers at the same level)[44]. In any case, identify if any approvals must happen in parallel or if a strict sequence is acceptable.
-
Saved Search or Script Conditions: In advanced cases, if workflow conditions need data not directly on the transaction (e.g., “total spending with this vendor this year” or items on the transaction), you might use a Saved Search condition. SuiteFlow transitions can be triggered by a saved search result – “Transition if this record appears in Saved Search X”[45]. That saved search could encapsulate complex logic. This is a powerful way to incorporate data-driven conditions that are hard to express otherwise.
-
After addressing such edge conditions, you effectively complete the workflow design.
8. Test the Workflow (in Testing Mode): Before rolling out, thoroughly test the workflow with various scenarios:
-
Use a Sandbox or Testing Environment: Ideally, build and test in a NetSuite Sandbox account which is a replica of production data (to truly see realistic behavior). If a sandbox isn’t available, use the “Testing” release status and perhaps restrict the workflow initiation to only your user or a test role via a condition (so that you don’t accidentally interfere with real transactions).
-
Simulate Scenarios: Create example transactions:
-
Below the lowest threshold (e.g., a PO of $1,000) – ensure it either auto-approves or follows the correct minimal path (maybe supervisor approval only).
-
Just above a threshold (e.g., $10,000 if that triggers manager approval) – ensure it goes to the right approver and stops at one level.
-
Far above the highest threshold (e.g., $100,000) – ensure it goes through all required levels (manager then CFO, in our design).
-
No approver defined scenario (if applicable) – see that it doesn’t get stuck (auto-approves or notifies).
-
Rejection case – let an approver reject and verify the requester gets notified and the record’s status is Rejected.
-
Edit-after-approval – try editing a fully approved record (e.g., change amount or reset status and save) and see what happens. By default, since our workflow might be set to trigger on create only, an edit on an approved record wouldn’t initiate a new workflow. If you want it to, you’d need to allow On Edit initiation and handle re-approval (for example, if amount increased significantly). We might not have implemented that yet, so observe current behavior to decide if that’s needed.
-
-
Check System Notes and Workflow History: NetSuite provides a Workflow History on the record (under System Information) where you can see which state the record is in and a log of transitions. Also check that the Approval Status field updates as expected in the record view (Pending Approval → Approved or Rejected, etc.), and that system notes reflect these changes (e.g., “Approval Status changed from Pending Approval to Approved by [Approver] on [Date]”).
-
Validate Email Notifications: Ensure all intended emails were received. They might go to the logged-in user’s email if you used dynamic values. Confirm links in the email work (try clicking the record link from the email to see if it directs properly to NetSuite).
-
If the workflow isn’t behaving as expected, use the Workflow Debug or Execution Log. You can enable debugging to step through the workflow. Also, the execution log will show each action and transition, which is helpful. For example, NetSuite’s troubleshooting example showed how the execution log indicated that the supervisor viewed the record and the Add Button actions ran only for them[46] – using such logs, you can confirm that conditions on buttons or transitions are working correctly.
Once you are satisfied that the workflow works for all scenarios, set the workflow record’s status to Released (and save) to make it active for all users. From this point on, any new high-value transaction will follow the workflow, and the designated approvers will have to approve it before it’s considered fully approved in the system.
Conditional Routing Logic: Roles, Amounts, and Departments
One of the powerful aspects of NetSuite’s SuiteFlow workflows is the ability to implement conditional routing – dynamically directing the approval flow based on attributes like transaction amount, the role or department of the requester, subsidiary, item type, etc. We’ve already seen conditions based on amount thresholds; here we delve a bit deeper into how to incorporate roles and departments, and provide a structured logic example.
Amount-Based Routing: This is the most common condition – using transaction amount to decide approval paths. As demonstrated, you can configure transitions that evaluate the amount relative to thresholds to determine the next state (e.g., if Amount > X go to CFO approval). In practice, you might maintain these thresholds outside the workflow (for easier maintenance) – for instance, in a custom Approval Matrix record or in employee records (Purchase Approval Limit field)[47]. NetSuite’s standard approach “routes a request through several approvers until it reaches the highest approver who can cover the total requested amount”[3], meaning at each step the system considers the approver’s limit. You can emulate this by a loop: have a state where you check the Current Approver’s limit vs. transaction amount. If the amount is above their limit, transition to the next approver (perhaps find their supervisor or a specific higher role)[5]. If it’s within their limit, finalize approval at that level[5]. This dynamic approach means you don’t hardcode the currency values in the workflow – rather, you rely on data (employee limits) which the business can adjust. For simplicity, though, many workflows use static threshold values in conditions, especially if the hierarchy is simple (like one extra level beyond a fixed amount).
Role-Based or Hierarchy-Based Routing: Roles and hierarchy often go hand-in-hand with amount. For example, you might say if the requester is from Department A, route to Approver X; if from Department B, route to Approver Y. Or, if transaction type is Capital Expenditure, require CFO regardless of amount. SuiteFlow allows conditions on virtually any record field, including the Department, Class, Location, or Role of the user. For instance, you can add a condition in a transition: Department = “IT” to branch to an IT-specific approver. In our earlier example, we implicitly assumed one approval chain for all POs. But you could have department-specific approvers or additional approvals. Perhaps POs from the Marketing department over $20k also need Marketing VP approval, whereas POs from Operations of the same amount only need the COO. You’d implement this by either multiple workflows or by adding more branches within one workflow: e.g., an initial decision state that checks the department and amount and routes to different “Pending Approval” states for each scenario (Marketing approval vs Ops approval). Each of those states could then converge to a common final approved state. The complexity increases with more branches, so it’s important to keep the logic structured and well-documented (a table of conditions and approvers is extremely helpful during design).
Routing by Employee Hierarchy: NetSuite can utilize the employee-supervisor hierarchy for approvals. If you want to generically always route to the requester’s supervisor as the first approver, you don’t even need a condition if you use the standard fields – NetSuite will automatically put the supervisor as the Next Approver if using the native Approval Routing[12]. In a custom workflow, you can mimic that by a script or by a saved search lookup. A simple trick: NetSuite’s “Current Record” in a workflow condition can access the requester’s supervisor via Employee: Supervisor (if the transaction has an Employee field). So you might use a Set Field Value (Next Approver = Employee’s Supervisor) initially. Then if higher approvals are needed, you might use the Purchase Approval Limit fields as described. Essentially, conditional routing can be data-driven to traverse an org chart. In the Citrin Cooperman example workflow, they started with the requester’s supervisor, then “if the supervisor does not have sufficient approval level, the process pushes the purchase order to the purchasing manager”, and then depending on the PO’s value, it gets directed to the appropriate level of approval[48]. This implies a chain: Employee -> Supervisor -> Purchasing Manager -> maybe Director -> CFO, with checks at each stage. They even mention a check for missing values: “a transition determines whether or not there might be a missing value; if so, it moves the purchase order up one approval level in the sequence”[49]. This covers cases like if a particular threshold isn’t set or a role isn’t specified, it skips upward to avoid stalling.
Using Segments for Routing: One technique highlighted in the example was using a financial segment like Department to manage approvers. By having custom fields on the Department record (such as an “Approval Manager” and “Approval Limit” for that department), the workflow can reference those. In the example, “they used the default department segment... with a few simple fields to identify which employee to mark as next approver, as well as values to check against the approval threshold for each department”[50]. This is an elegant design as it externalizes the approval rules: each department “knows” its threshold and approver. The workflow can then say: set Next Approver = Department.Approver; if Amount > Department.Threshold, set Next Approver = maybe Department.Executive Approver, etc. This way, when org structure changes or thresholds update, you edit the Department records instead of the workflow. It’s a more advanced configuration but very powerful for large organizations with varied rules.
Summary Example of Conditional Logic: To illustrate, here’s a sample matrix of approval routing rules (just as an example scenario):
| Criteria | Approval Routing |
|---|---|
| Transaction Amount ≤ $5,000 | Auto-approve (no additional approval needed). |
| $5,001 – $50,000 | Department Manager approval required. |
| > $50,000 (up to $100,000) | Manager approval then CFO approval required. |
| > $100,000 | Manager, CFO, and CEO approval required. |
| Any PO from “IT” Dept > $10,000 | Add IT Director approval (in addition to above rules). |
| Requester is CEO (any amount) | Auto-approve (CEO has ultimate authority). |
| Any transaction marked “CapEx” | Always require CFO approval (even if below normal $). |
Such a table can be implemented in SuiteFlow using combinations of conditions on transitions. You might need multiple workflows or a very branched single workflow to cover all. Often, separating by transaction type or category can simplify things (e.g., a dedicated CapEx workflow vs. an Opex PO workflow).
In practice, start with the simplest necessary logic (don’t overcomplicate). Ensure that for each condition branch you have corresponding transitions and that they funnel to an appropriate end state. Testing conditional routing is critical – try records on each side of every boundary (just below threshold, just above threshold, etc.) to verify the logic is correct.
Integration of Email and System Notifications
Effective approval workflows keep all stakeholders informed at each step. NetSuite facilitates this through email alerts and in-system notifications such as reminders and dashboards. Below are best practices for integrating notifications into your custom approval workflow:
-
Email Notifications to Approvers: As soon as a transaction enters an approver’s queue, the workflow should notify them via email. This email typically contains key information about the transaction (type, number, amount, requester, etc.) and a direct link to view it in NetSuite. For example, when a purchase request goes to a supervisor, the workflow can automatically send an email: “Purchase Order #1234 for $75,000 requires your approval” with a link that opens that PO in NetSuite[39]. NetSuite’s SuiteFlow “Send Email” action can use templates or custom text; you can incorporate fields like {tranTotal}, {requestor}, {tranId}, and a URL. Providing the link is important so approvers can quickly navigate to the record to take action[39]. If you have SuiteApprovals and email approval enabled, the email can even contain an “Approve” link or button that the user can click without logging in (those interactions get logged back to NetSuite securely) – this requires extra setup (email templates, unique tokens for approval) which SuiteApprovals documentation covers[51].
-
Email Confirmations to Requesters: When an approval decision is made, especially final approval or rejection, send an email to the transaction’s originator (and possibly their supervisor or a finance team alias). For instance, “Your vendor bill for $20,000 has been approved by [Approver Name]” or “Your purchase request has been rejected – reason: Budget exceeded.” Including the reason or next steps (like “please contact approver for clarifications or edit the request and resubmit”) helps close the loop for the requester.
-
Consolidating Notifications: One pitfall to avoid is overloading approvers with too many emails for incremental steps. If a transaction has multiple levels, you might configure the workflow to email only when it specifically enters their queue, not every single step. For example, the CFO doesn’t need an email when a manager approves (unless you want a full audit trail notification); the CFO should get an email when it’s their turn to approve. Similarly, perhaps notify the requester only once at final outcome, rather than after each intermediate approval (unless they need reassurance it’s progressing). Tailor the notification scheme to your company’s preference – some like every action emailed, others prefer minimal notifications and rely on dashboard reminders.
-
System Reminders and Dashboard: NetSuite’s Employee Center and main UI have a Reminders portlet which can show “Transactions Pending My Approval”. If you use the standard fields (Approval Status, Next Approver), this works automatically: the system populates a reminder for the approver when they have something to approve[38]. In our custom workflow, as long as we set Next Approver properly and use the standard statuses, approvers logging in will see a queue. Specifically, in the Employee Center (a role often given to managers or supervisors for lightweight access), there’s an “Approve Transactions” page that lists all records awaiting that user’s approval[21]. Our workflow should interplay with this by updating the Next Approver field at each stage. For example, when a PO goes to the CFO, Next Approver = CFO; NetSuite then knows to show it on CFO’s reminders. It’s noted that “Employees are shown all purchases for which they are the next approver” in the Employee Center[52]. So leveraging this built-in interface can improve user adoption – they don’t have to hunt through records; a centralized list is provided.
-
In-Record Notifications (Flags/Fields): Some companies also use field styles or flags on the record itself – like a bold text field “Pending CFO Approval” that is visible on the form as a reminder. You could implement this by having the workflow set a field or the title based on status. This is optional (since status and next approver already convey it), but sometimes a visual cue on printouts or PDF outputs is desired (like watermark “Pending Approval”).
-
Activity and Task Creation: If emails are not enough, you could have the workflow create a NetSuite Task or Phone Call record assigned to the approver, reminding them to approve. This might be useful if approvers use the Activities portlet. However, this can clutter CRM activities if overused. Email and reminders are usually sufficient.
-
Audit of Notifications: Ensure emails have clear subject lines and content for audit purposes. SuiteApprovals even tracks email notifications in an Email Approval Log[53]. While that level of detail may not be required for all, it’s useful to know what was sent when. If needed, you can BCC an internal mailbox for all approval emails to keep a record outside NetSuite.
-
Escalation Notifications: One advanced idea – if an approval is pending too long, trigger a reminder or escalate to someone else. This could be done via a scheduled workflow or script that finds records pending > X days and re-sends email or notifies a higher-up. Though not part of initial build, keep this in mind if timely approvals become an issue.
By thoughtfully integrating email and system notifications, you ensure that approvers are aware of their tasks and requesters are kept informed. This reduces the need for manual follow-ups. Just be sure to tune the frequency and recipients of notifications to the culture of your organization – some prefer an email for every action, others rely on dashboards and only want key outcomes emailed.
Setting Up Audit Trails and Approval History
For compliance and transparency, it’s important to maintain a clear audit trail of the approval process. Auditors or management may ask: “Who approved this transaction, and when? Who was involved in the approval chain? If it was rejected, why?” NetSuite provides several mechanisms to capture this information:
-
System Notes (Field Audit Trail): NetSuite’s System Notes automatically log changes to records. If you use the native Approval Status field and Next Approver field, each time these fields change, a system note entry is created with timestamp, old value, new value, and the user who made the change. For example, when the manager approves and the workflow sets the status to “Approved” (or perhaps sets Next Approver to CFO), you will see an entry like: Apr 5, 2025 10:32:10 – Status changed from Pending Approval to Approved by [Manager]. Then another when CFO approves: Status changed from Approved to Approved (Final) (depending on how statuses are labeled) or a note that Next Approver was cleared. These system notes serve as an audit log. You can create a Saved Search of system notes filtered by field = Approval Status (or any fields you care about) to produce an approval history report. In fact, NetSuite’s notion of an “Audit Trail” is often implemented via saved searches over system notes[54].
-
Workflow History / Execution Log: Each record that goes through a SuiteFlow workflow has an associated workflow history you can view. In the record, under System Information > Workflow (if enabled on the form), you can see which workflow instance ran, current state, and you can drill into an Instance log. This log will list state entries, actions executed, transitions taken, etc., with timestamps and user contexts. It can be technical to read, but it’s available if someone with the right permission wants to trace the approval flow step-by-step for a given transaction. The example snippet we saw shows “workflow execution log for the Pending Approval state” that captured each time the record was viewed and by whom[55]. While not typically printed out for audit, it’s an internal record of the process.
-
Approval History Subtab (SuiteApprovals): If you leverage the SuiteApprovals SuiteApp, NetSuite will automatically show an Approval History subtab on the record (for supported types) that lists all the approval actions in a human-friendly format[18]. This subtab includes columns like Action (Approved/Rejected), Action Owner (who did it), Date, Approval Status, Approver Type (e.g. supervisor, CFO), Next Approver, and Remarks[56]. Every time an approver approves or rejects via the SuiteApprovals workflow, an entry is added. This is extremely useful for an auditor or any stakeholder to open a transaction and immediately see the chain of approvals it went through. Even without SuiteApprovals, you can mimic a basic version of this by using fields or child records – e.g., have a child custom record “Approval Log” where each approval step creates a record (with name, role, date, decision, comments). However, that’s a bit of custom development. Many companies opt to use system notes and maybe add a field on the main record for “Approved By” where they concatenate names.
-
Transaction Audit Trail (Report): NetSuite has a built-in Transaction Audit Trail report (at Transactions > Management > View Audit Trail) which logs additions, edits, and deletions of transactions[57]. This will show when a transaction was created and if someone edited it. If an admin bypasses or changes something (e.g., manually sets a status), that appears here. While not specific to approvals, it’s part of overall audit.
-
User Notes / Comments: It’s good practice to capture rejection reasons or approval comments. The workflow can prompt approvers to fill in a reason field when rejecting. For example, you could add a custom textarea “Rejection Reason” on the transaction. The Reject button’s transition could be set to only execute if that field is not empty (ensuring the approver entered a note). Alternatively, use a Suitelet pop-up or SuiteApprovals’ built-in comment feature. These comments can then be saved either in a field or as a user note on the record. Having a reason like “Vendor overpriced, please seek additional quotes” adds context to the audit trail beyond just “Rejected”. GURUS Solutions describes a method of using a custom child record to store rejection reasons or approval comments in the workflow for exactly this purpose[58][59].
-
Logging Delegation or Overrides: If you allow any kind of override or an admin to force approve, make sure that action is logged (either via system notes if they change status manually, or via an audit comment). SuiteApprovals tracks if a record was approved by a Final Approver or via a delegation[60]. You may want to replicate that clarity in custom processes (e.g., an override might be recorded as “Approved by CFO (override) on date”).
-
Regular Review: From a compliance perspective, consider setting up periodic reports of high-value transactions and their approvals. For instance, a saved search that lists all POs over $50k in the last quarter with their approval status and who approved them. This can be reviewed by internal audit or finance committees. The data for such a search can come from the transaction record (fields like Approved By, or system notes via SQL expressions).
In summary, your custom approval workflow should not only perform the approvals but also document them. By using existing fields and features, much of this comes for free: “Approval details are tracked for records routed for approval”[61] in NetSuite either through system notes or the SuiteApprovals history. The goal is that at any later date, one can answer: Was this transaction approved? By whom? When? and even Why was it approved/rejected? — all without digging through emails. Proper configuration and perhaps a couple extra fields for comments ensure a robust audit trail.
Best Practices for Testing and Deploying Approval Workflows
Building the workflow is only half the battle; ensuring it works correctly in production and can be maintained is equally important. Below are best practices for testing and deploying your custom approval workflow:
-
Develop in Sandbox or Release in Testing Mode: It’s risky to develop workflows directly in a live production account, especially those affecting financial approvals. Use a Sandbox environment to configure and experiment with the workflow using realistic data. If a sandbox is not available, utilize the Testing release status in SuiteFlow[26] so that the workflow does not impact regular users. You (as admin) can simulate transactions in testing mode, and other users won’t accidentally trigger the workflow until it’s ready. Once confident, switch the status to Released to activate it system-wide.
-
Unit Testing – Cover All Paths: As discussed in the step-by-step section, test each branch of your workflow with sample records. Write down each scenario (small amount, large amount, no supervisor, reject path, etc.) and verify the outcome matches expectations. This thorough testing will catch logic errors (e.g., a condition mis-specified as > instead of ≥) before any real transaction is held up. Make sure to test with users in different roles to confirm buttons and permissions behave (e.g., a Manager can see the Approve button on their subordinate’s PO, but a regular employee cannot approve their own PO).
-
Use Workflow Execution Log for Troubleshooting: If something isn’t working during tests (e.g., an email didn’t send, or a transition didn’t fire), consult the Workflow Execution Log. NetSuite provides details on each action’s execution and whether conditions evaluated to true or false. For example, if an expected transition didn’t occur, the log might show “Condition not met, transition skipped.” This can help pinpoint if a field was mismatched or if a timing issue occurred. NetSuite’s troubleshooting documentation gives examples of reading these logs[46].
-
Testing User Permissions: Approvals often involve users (like executives) who may not use NetSuite daily or have limited roles. It’s important to test with an account that has the exact role the approver will use. For instance, a CFO might only have an “Employee Center” role or a custom limited role for approvals. Log in as that role (or use the
View As Rolefeature if you have access) and ensure:-
They can see the transactions they need to approve (appropriate subsidiries, departments permissions).
-
They cannot edit the record fields (should be locked or no edit rights).
-
They can click the Approve/Reject buttons and successfully complete the action.
-
They receive the email notifications and can access the links (for an Employee Center user, ensure the link doesn’t direct them to a page they can’t access).
-
If they delegate, test the delegate’s access similarly. This prevents a scenario where a workflow is deployed and then an approver complains “I can’t see the PO” or “the approve button doesn’t do anything for me”.
-
-
Performance Considerations: Workflows operate in real-time on record save and view events. Ensure that your approval workflow is efficient:
-
Avoid heavy computations or calling large saved searches on every view if possible (this could slow down record loading for approvers).
-
Keep the number of states and transitions as minimal as needed to cover the logic. (Each state entered and action executed adds a bit of processing).
-
Check NetSuite’s Workflow Governance (which is like usage units limits). If your workflow does many actions (setting fields, sending emails, etc.), ensure it doesn’t exceed usage limits in testing. Normally, simple approval flows are fine, but complex ones with many parallel approvals or loops should be reviewed for any signs of hitting limits.
-
If you have dozens of conditions, consider if a simpler approach (like a lookup table via script) is more maintainable.
-
-
Bundle or Document the Workflow for Deployment: When moving from sandbox to production, you have a few options:
-
Recreate the workflow manually in production (prone to error).
-
Bundle the workflow using SuiteBundler. You can create a SuiteBundle containing the workflow definition (and any custom fields or scripts it uses) and install that bundle into production. This ensures nothing is missed and the workflow is identical to what you tested. NetSuite specifically supports bundling workflows for seamless transfer between accounts[62].
-
If using SuiteCloud Development Framework (SDk), you could also deploy via XML definitions, but that’s more advanced. Bundling is straightforward for most admin users.
-
Whichever method, ensure that any custom fields (like Approval Status if custom, Rejection Reason fields, etc.) and custom records are included in the deployment.
-
-
Coordinate Activation Timing: It’s wise to activate a new approval workflow at a low-traffic time or period (e.g., not in the middle of end-of-quarter rush or year-end) so that any issues impact fewer transactions. Communicate with users (requesters and approvers) that a new approval process is being rolled out effective X date. There might be a cutover: transactions created before that date might still follow the old process, and new ones follow the new workflow. Plan how to handle any in-flight approvals during the transition.
-
Train and Inform Users: Even though the workflow automates the process, people need to know their roles. Provide a short guide or training to approvers on how to use the workflow: how they’ll be notified, how to find their pending approvals (via email link or Reminders), how to use the Employee Center queue to approve multiple at once (NetSuite allows batch approval from the Employee Center “Approve Transactions” page)[63][64]. Also instruct requesters about what to expect – e.g., “after you submit a PO, it will show as Pending Approval until Manager and CFO approve it; you’ll get an email when done or if rejected.”
-
Testing in Production (Pilot): After deployment, consider doing a pilot with one department or a set of transactions. For example, maybe start using the workflow for only the Finance department’s POs initially (you could include a temporary condition like Department = Finance to trigger it), and see if everything flows correctly in the live environment. Once confirmed, remove that filter to roll out to all departments.
-
Backup Plan: Keep a way to bypass the workflow in case something goes wrong in production. Since approvals can affect critical operations (e.g., ordering supplies), you want a fail-safe. The fail-safe could be:
-
Having an “Admin Approval” script that can force approve a stuck transaction (only for admins).
-
Keeping the old manual process for a short overlap period.
-
Ensuring you can quickly deactivate the workflow (set it to inactive or remove initiation triggers) if it behaves unexpectedly, so that it doesn’t block transaction entry. Because NetSuite does allow manually setting an approval status if you have Full permissions, an admin could manually approve transactions as a last resort[65][66].
-
However, manual intervention should be a last resort and audited if used.
-
-
Monitor and Iterate: After deployment, monitor the first few high-value transactions through the workflow. Check that emails went out and were received, check the system notes for proper entries, and solicit feedback from the approvers: Was the process clear? Did the notifications and reminders suffice? Use this feedback to tweak the workflow (perhaps adding an extra email notification, or adjusting a condition). It’s much easier to adjust early on than to let an inefficient process persist.
By following these testing and deployment best practices, you will minimize disruptions and ensure that the custom approval workflow achieves its purpose smoothly. Remember that an approval workflow touches both system configuration and human behavior – success comes from careful technical implementation and user adoption, which testing and training facilitate.
Security and Access Control Considerations
When designing approval workflows for financial transactions, special attention must be paid to security and access control. You want to ensure that only authorized personnel can approve transactions, and that no one can circumvent the controls put in place. Here are key considerations and tips:
-
Role-Based Access to Approve: Define specific roles or permissions for approvers. NetSuite’s paradigm is often to give managers the necessary transaction permissions (like Edit or Full access to the record type) but you might not want them to freely edit, only to approve. A solution is to rely on the workflow’s Approve/Reject buttons which perform controlled actions, rather than giving managers direct edit rights. For example, an approver can have View permission to the transaction, which allows them to see it (and with SuiteFlow’s custom buttons, they can trigger approvals) but not edit the fields directly. In NetSuite’s Employee Center approach, “Users are not required to have Full permission … to approve and reject purchases; they can do so with only View permission”[67]. This principle keeps approvers from changing transaction details; they can only perform the approve/reject workflow actions.
-
Limit Who Can Approve/Reject: Use workflow conditions on the approval actions to enforce that only the designated approver can actually approve. As noted, we set the Approve button to show only for certain roles/users[32]. Additionally, the transition could double-check the current user. For instance, the transition condition could be
currentUser == {record.nextApprover}to ensure the person executing the transition is the expected approver. If someone somehow accessed the record and tried the button (or via URL hack), the transition wouldn’t fire if they’re not the next approver. This is an important safety net to prevent unauthorized approvals. -
Prevent Bypassing via Editing: By locking the record during the approval process, we prevented users from editing fields to possibly get around approvals. Another scenario: what if someone with high permission (like an Administrator) manually edits the Approval Status field to “Approved”? In a strong control environment, only the workflow should set that field. While you can’t practically stop an Admin (they have all powers), you can at least monitor it. Consider requiring that administrators still follow the workflow for approvals, or if they do override for an emergency, it’s documented. If you use SuiteApprovals, you can designate a “Super User” who can approve all transactions[68] – typically this would be an internal control where, say, the CFO can always force approve if needed. But use that feature sparingly and keep track when it’s used.
-
Field Level Security: Mark fields like Approval Status or Next Approver as not editable by users via role permissions (for roles other than admins or the workflow context). NetSuite allows setting field level restrictions in forms or via scripting. Ideally, the only way those fields change is through the workflow. That way, an enterprising employee cannot mark their own transaction as approved by editing the field on the form. Similarly, you might hide the Next Approver field from entry forms to avoid tampering or confusion (it’s the workflow’s job to set it).
-
Segregation of Duties (SoD): Be mindful of SoD principles. The person who creates a transaction should not be the one approving it. NetSuite’s standard approval routing inherently enforces that (an employee’s purchase limit is usually 0 or a small amount, forcing supervisor approval for anything above)[1]. In custom workflows, include checks: if somehow the approver equals the requester (like a manager entering their own expense report), you might require it goes to that person’s supervisor instead. There have been cases where a user might have multiple roles (e.g., an employee who is also an approver). Make sure they cannot approve their own request by switching roles. One way is the condition
Employee (on transaction) != Current Useron the approval transition, combined with the Next Approver check, to catch self-approval attempts. Ensuring no self-approval maintains integrity. -
Data Security (Visibility): Often high-value transactions contain sensitive data (large dollar amounts, strategic purchases). Ensure that only relevant personnel can even see these transactions in the system. This might involve NetSuite’s permissions on transaction types by subsidiary or department. For example, you might restrict regular employees from seeing POs at all (they only see their own maybe), whereas managers can see POs of their subordinates’ departments. The workflow doesn’t directly control this, but your role setup should. The worst case would be someone unauthorized stumbling on an internal high-value PO and approving it (if they had a role that somehow allowed it). So double-check roles: the ones that can approve should be limited to those who truly hold that authority.
-
SuiteApprovals Security Features: If using SuiteApprovals, take advantage of its built-in settings. It “lets you make sure only authorized individuals can edit, approve, reject, and resubmit records for approval”[17]. Under the SuiteApprovals configuration, you define approvers and their limits; the system will enforce that only they (or designated delegates) can approve. It also handles cross-subsidiary visibilities as noted (approvers can be allowed to see records of subsidiaries they don’t normally have access to, just for approval purposes)[69] – if your business operates that way. Be careful granting that; it’s a setting to consider if a parent-subsidiary CFO needs to approve across subsidiaries.
-
Logging and Alerts for Security: Introduce monitoring for any unusual activity. For example, set up a saved search for any transaction that was approved by someone who is not in the expected approver list, or approved outside the workflow (in case an admin manually flipped something). Also, consider sending an FYI notification to someone (like Internal Audit or CFO) whenever a very high amount transaction is approved, as a secondary check.
-
Backup Approver Access: Ensure backup approvers (alternates) have the necessary access. If a manager is out and their delegate needs to approve, that delegate must be able to see the records. Sometimes this gets overlooked – the delegate might not have access to that department’s records. You might need to temporarily adjust permissions or use the “Alternate Approver” feature on the employee record (which the standard approval routing can respect)[43]. For custom workflows, you could include logic like if an Alternate Approver field is filled and active (perhaps an “Out of Office” flag), route to that person. Security-wise, manage who can set an alternate (likely HR or admin, not the user themselves unless policy allows).
-
Encryption and Email: If your approval emails contain sensitive info (like dollar amounts or project details), be mindful of email security. Emails go outside NetSuite’s secure environment. You might keep details high-level and require login to see specifics, if that’s a concern. NetSuite’s email approvals feature tries to secure this via unique tokens and logs[51], but plain email still has some risk. Some companies avoid putting full financial details in email body for confidentiality, using wording like “Please log in to review the transaction”.
-
Test Security Scenarios: As part of testing, attempt some negative scenarios: try to approve when not allowed, try to edit a locked record with a non-admin role, try to view a transaction with a user who shouldn’t. Ensure the workflow and permissions scheme collectively block these actions.
In essence, the approval workflow acts as a gatekeeper for high-value transactions – but you must support it with proper role permissions and conditions. The design should uphold the rule that only the right people at the right time can move a transaction forward. Done correctly, the workflow combined with NetSuite’s access controls will enforce an ironclad approval process: no PO over the limit gets processed without the required signatures. And by leveraging NetSuite’s features to restrict editing and unauthorized actions, you greatly reduce the risk of someone manipulating the system to push through an unapproved transaction.
Common Pitfalls and How to Avoid Them
Implementing approval workflows can be challenging, and several common pitfalls may arise. Below we list these pitfalls along with strategies to avoid or mitigate them:
-
Unclear or Overly Complex Approval Rules: A frequent mistake is diving into building the workflow without clearly defining the approval rules, which can result in an overly complex or even flawed workflow. If the approval hierarchy or conditions are not well understood, the workflow may not cover all cases or may behave unpredictably. Avoidance: Spend adequate time upfront documenting the rules (who approves what, under which conditions). Use a decision matrix or flowchart and get sign-off from business stakeholders. As Marty Zigman (NetSuite expert) noted, if you can’t express the rules clearly in a spreadsheet, it’ll be difficult to configure and test them in the system[24]. Simplify the rules if possible, and break them into manageable parts. It’s better to start with a simpler workflow and iterate, than to attempt a grand design that becomes unwieldy.
-
Not Handling Exceptions (Missing Approvers or Limits): Many workflows fail when encountering an unexpected scenario – e.g., a supervisor field is blank, or a transaction is so high it exceeds all defined limits, or an approver is not available. This can lead to stuck records in “Pending” with no path forward. Avoidance: Always build a default path. For missing approver scenarios, decide a fallback: auto-approve, or assign to a specific role (maybe the CFO by default). NetSuite’s standard routing will alert if no approver has enough authority[42], but in custom workflows, you need to create that alert or path. Include conditions like we did: if no supervisor, auto-approve (or assign to a top role). For transactions beyond all limits, perhaps route to the CEO or board (some companies might not allow those at all without manual intervention, but the workflow should at least notify someone). Additionally, implement the “Alternate Approver” functionality or at least a way to swap approvers if someone is out, as discussed earlier[43][70].
-
Lack of Delegation or Override Mechanism: Real-world scenarios sometimes require breaking the normal rules (e.g., urgent approvals when approvers are unreachable). If your workflow doesn’t allow any flexibility, it can impede business (like an important purchase stuck because the approver is on vacation and no delegate was set). Avoidance: Build in a delegation capability – either through the alternate approver approach or by allowing certain high-level roles to approve in place of someone. Also, decide on an override process: for example, the CFO (or a super admin) can force-approve a transaction in emergency. Marty Zigman emphasized considering “What will be the mechanism for someone to override the approval chain? … What do you do when a named manager is not available, such as on vacation?”[70]. You can address this by, say, giving the CFO role a button or script to approve anything (with logging), or by instructing that an admin can temporarily assign a different approver in the employee record and then remove them after. The key is to have a procedure so the workflow doesn’t become a single point of failure.
-
Approvers Not Using the System: Another pitfall is assuming approvers regularly log into NetSuite. If an approver is not a daily user, they might miss approvals, causing delays. “Many organizations need approvals from folks that are not licensed users. Yes, an email is a good notification, but many are drowning in emails – they need a list so they can get it done.”[71]. Avoidance: Provide user-friendly approval options. If approvers don’t log in often, enable email approvals (via SuiteApprovals) so they can simply reply “Approve” from their phone, or ensure that email notifications are very clear and maybe send reminders. Alternatively, consider giving such approvers an Employee Center license and show them how to use the single-click approval page with a list of pending items. Sometimes involving executive assistants to help monitor pending approvals can mitigate this as well. The worst-case fallback: if an approver consistently doesn’t respond, have an escalation rule (e.g., after X days, notify their boss or backup).
-
Workflow Not Ending or Resetting Properly: A common technical pitfall is workflows that either never end or restart inappropriately. For example, a record gets approved and the workflow ends, but then someone edits the record and it triggers a new instance unexpectedly, or conversely it needed reapproval but the workflow didn’t restart. Avoidance: Use workflow conditions and the “Do Not Exit” setting wisely. SuiteFlow has a property on states called “Do Not Exit” which, if checked, keeps the workflow instance active even after an end state is reached (useful if you want to catch record edits later). However, if misused, it can cause an approved record to remain stuck in an old instance. A tip from GURUS: “Prevent re-entry of approved transactions with ‘Do Not Exit’ states or workflow conditions.”[72]. This means, once a record is fully Approved, you typically want the workflow to exit/complete (so it doesn’t interfere further). If you need to handle edits to an approved record, consider a separate workflow or a script that resets the status and triggers a new approval workflow instance. Also, include a condition at the workflow initiation like only run if Approval Status is Pending Approval to avoid re-triggering on already approved records. Testing the edit scenarios will help fine-tune this.
-
Notification Overload or Insufficient Notifications: As mentioned, either extreme is bad. Too many emails (every tiny action) can cause users to ignore them. Too few notifications, and someone might not realize a task is waiting. Avoidance: Find a balance:
-
Possibly consolidate multiple pending approvals into one email (if a manager gets 5 POs in a day, one summary email or just relying on the dashboard might be better than 5 separate emails).
-
Use clear subject lines like “ACTION REQUIRED: Approve Purchase Order #1234” for immediate visibility.
-
If approvals are time-sensitive, consider adding reminder emails. But ensure they stop once done (to avoid confusion).
-
Solicit feedback: ask approvers if the frequency and content of notifications is good for them, adjust accordingly.
-
-
Not Leveraging Native Features (Reinventing the Wheel): Sometimes, implementers build very elaborate workflows that replicate things NetSuite already does. For instance, coding a script to find an employee’s supervisor, when NetSuite already has that link and features like “Next Approver” logic in standard workflows. Or creating custom “Pending Approval” statuses when the standard field would suffice. Avoidance: Use NetSuite’s built-in constructs where possible. The Approval Status field, Next Approver field, employee Supervisor/Approver relationships, and Purchase Limit fields are there for a reason[37][1]. By using them, you get out-of-the-box support like reminders and consistency with other processes. Similarly, consider installing SuiteApprovals if your requirements align, rather than building everything from scratch, because it might cover scenarios you haven’t thought of (like project-based approvals, email logs, etc.)[73]. In short, don’t script a solution if configuration can handle it – it’s easier to maintain.
-
Insufficient Testing and Change Management: Rushing an approval workflow without full testing or failing to update it when business rules change is a pitfall that can cause serious business disruption. An untested workflow might block transactions or send approvals to the wrong person. Also, if next year the threshold changes or the org chart changes and the workflow isn’t updated, it might send to a wrong or vacant role. Avoidance: As stressed, test thoroughly before launch. And treat the workflow as living business logic – assign someone ownership to update approvers or limits in the workflow configuration when policies change. A best practice is to review approval workflows periodically (e.g., annually) to ensure they still match company policy. Use SuiteFlow’s documentation features (you can export or document the workflow diagram) to keep a record of its intended design.
-
Performance Pitfalls in Large-Scale Use: If the company processes a huge volume of transactions, a poorly optimized workflow might slow down record saves. For example, if each save triggers a saved search of many records to decide approvers, that could add seconds to each transaction save. Avoidance: In high-volume scenarios, test the workflow performance. If it’s slow, consider simplifying conditions or doing some pre-computation (like storing approval rules in fields for quick access). Ensure that adding the workflow does not excessively slow down transaction entry for end users. If it does, look for bottlenecks in the logic.
-
Ignoring Localization or Edge Cases: If operating in a multi-subsidiary environment, ensure the workflow works for all (e.g., currency conversion if limits are in different currencies – NetSuite converts transaction amounts to employee’s currency to compare limits[74]). Make sure your logic accounts for currency or uses a single currency threshold. Also consider any differences in process for different subsidiaries or business units – you might need separate workflows if processes diverge significantly.
By anticipating these pitfalls and proactively designing your workflow and processes to address them, you will save time and frustration. In summary: keep the workflow logic as clear and simple as possible, handle the “what ifs,” test like an end-user, and maintain vigilance after deployment. The result will be an approval workflow that is robust, reliable, and embraced by your organization rather than circumvented.
Example Use Cases Across Industries
Approval workflows for high-value transactions are utilized in virtually every industry, but the specifics can vary based on industry needs and common transaction types. Below are a few example use cases in different industries illustrating how custom NetSuite approval workflows can be applied:
Retail and E-Commerce
In the retail industry, margins are tight and purchasing needs to be closely controlled to manage inventory levels and costs. A common use case is Purchase Order approvals for merchandise buying. For example, a large retail chain might set up an approval workflow such that:
-
Store Managers can approve purchase orders for store supplies up to $5,000.
-
Purchases of inventory for stock replenishment up to $20,000 require the Regional Manager’s approval.
-
Any PO exceeding $20,000 (for instance, a bulk inventory buy for a season) is routed to the corporate Merchandising Director or CFO for approval. This ensures big investments in inventory are overseen by senior management for budget adherence.
-
Additionally, certain product categories might need special approvals regardless of amount. E.g., purchase of capital equipment (new POS systems, store fixtures) might always require headquarters approval.
-
The workflow could also integrate with budget data: if a purchase would cause a department to exceed its quarterly budget, it might route to Finance for review.
Such a workflow provides improved control: “High-value transactions receive proper oversight”, and ensures that only appropriate levels of management can authorize large expenditures (a principle in retail to prevent over-ordering or fraud) (Source: annexa.com.au. It also creates an audit trail for spend, which is important for public retail companies.
Manufacturing and Distribution
Manufacturing companies often deal with large procurement of raw materials or expensive machinery. Consider a Capital Expenditure (CapEx) approval workflow for a manufacturing firm:
-
Any purchase request tagged as “CapEx” (like buying new equipment, vehicles, or facility upgrades) above a certain small amount goes to the Engineering Manager or Operations Director first to validate the need.
-
If the amount exceeds $50,000, it then requires CFO approval (ensuring alignment with capital budgets and possibly Board notification).
-
Above $200,000, perhaps a CEO or even Board-level approval is mandated by corporate policy (some companies require board approval for very large capital purchases).
-
For operational purchases (raw materials, components), the workflow might be multi-tiered: Production Supervisor approves up to $10k, Supply Chain Director up to $100k, CFO beyond that, for example.
-
There might be additional logic for vendor selection: if the vendor is new or not approved, maybe the purchase request also needs Procurement Department approval regardless of amount (to vet the vendor).
In manufacturing, the focus is on controlling spend while keeping production running. Approval workflows help enforce compliance with procurement procedures (e.g., requiring quotes, ensuring large spends get financial oversight). They also maintain an audit trail which is useful for cost accounting and justifying large asset purchases. This ties into risk control: ensuring large capital investments are properly authorized so the company doesn’t overspend or invest unwisely.
Professional Services and Consulting
Professional services firms (consulting, law, agencies) may not deal with physical inventory, but they handle large client projects and significant expenses (travel, subcontractors, etc.). Example use cases:
-
Client Project Budget Approval: Suppose a consulting firm needs to approve any project engagement over $100,000. An approval workflow could route large Sales Orders or Proposals to a Senior Partner or Finance Director for approval before they are sent to the client or officially booked. This ensures the pricing, scope, and terms of big projects are reviewed at a high level (a form of risk management to ensure the project is profitable and within the firm’s capacity).
-
Expense Report Approvals: Consultants often incur travel expenses. A workflow might allow project managers to approve their team’s expense reports up to $5,000, but any single expense report (or monthly total) exceeding $5,000 goes to the Finance Manager or CFO for approval. This catches unusually high travel spends or possible errors (like someone mistakenly submitting $50,000 instead of $5,000). It also helps cash flow oversight.
-
Vendor Bill Approvals for Subcontractors: Many professional services use subcontractors for specialized tasks. In NetSuite, subcontractor invoices (vendor bills) maybe need approval by the project lead and accounts payable. A custom workflow can route a vendor bill first to the Project Manager to confirm the work was satisfactory, then to the Accounting Department (AP Manager) if above a threshold to approve payment. This ensures both operational verification and financial approval. For example, a law firm might require any expert witness fee above $20k to be approved by a partner in charge.
-
Time Entry Approvals: Some professional services have workflows to approve timesheets if they surpass a certain hour or cost threshold on a project – but this is more operational. Still, NetSuite can handle time tracking approvals similarly via SuiteFlow.
The professional services context emphasizes billable work and reimbursable expenses. Approval workflows protect the firm’s margin by ensuring large costs are agreed to and can be billed to clients or absorbed. They also help in compliance if clients require that certain expenses get pre-approval (some client contracts specify travel over a certain amount must be okayed by the client or a partner – the workflow can be adapted for that by including a step where a partner must approve before the expense is considered billable).
Other Industries
-
Software/Tech Companies: May use approval workflows for large sales discounts. For instance, if a sales rep wants to give over 20% discount on a software deal, an approval from the VP of Sales or CFO is required because that impacts revenue. NetSuite workflows can trigger on sales orders or quotes with high discount rates – routing them to execs for approval to protect margins.
-
Healthcare Organizations: Might require approvals for high-value procurement of medical equipment or for large service contracts. Also, due to regulatory compliance, any expenditure above a threshold might need compliance officer sign-off.
-
Nonprofits: They often have tight grant budgets. An approval workflow could ensure any expense drawing from a grant above X dollars is approved by the grant manager and finance to ensure it’s within grant guidelines.
-
Government (Public Sector): Usually, multi-level approvals are mandated by policy (e.g., by dollar thresholds aligned with procurement laws). NetSuite can be configured to follow those thresholds precisely, with documentation at each step (which is useful for audits and public transparency).
Each of these scenarios leverages the core principles described in this report: threshold-based triggers, multi-role routing, notifications, and audit trails – just tuned to the industry’s processes. The flexibility of NetSuite’s SuiteFlow and SuiteApprovals means the same underlying technology can enforce corporate policy whether it’s a retail PO or a consulting contract. By studying these examples, you can often identify patterns relevant to your own business and configure your workflow accordingly.
Conclusion
Building a custom approval workflow in NetSuite for high-value transactions is a powerful way to strengthen financial controls and streamline business processes. By defining clear thresholds for what constitutes a high-value transaction and routing those transactions through the appropriate approval chain, organizations can ensure oversight on significant commitments while maintaining efficiency on routine ones. We explored how NetSuite’s SuiteFlow engine allows creation of flexible, multi-stage approvals with conditions based on amount, roles, departments, and more – enabling everything from simple supervisor approvals to complex hierarchical and conditional routing for large transactions.
We also discussed the importance of aligning the workflow with business drivers: reducing fraud risk, ensuring compliance with policies and regulatory requirements, and providing a transparent audit trail of approvals. Tools like SuiteApprovals add further capabilities such as email approvals and a built-in approval history log, which can augment or even replace custom workflows for many use cases[17]. Regardless of the tool used, success lies in the details of implementation – from adding custom Approve/Reject buttons and email notifications, to locking records to prevent unauthorized changes[33], to capturing every approval action for audit purposes.
Throughout this report, best practices were emphasized: planning the workflow logic meticulously, using native NetSuite features (like Approval Status, Next Approver fields, and employee approval limits) for consistency[1], thoroughly testing all scenarios in a sandbox or controlled setting, and educating users about the new process. Common pitfalls – such as missing edge conditions, overwhelming users with notifications, or workflows that get stuck – can be avoided with careful design and iterative refinement[72][70].
When deployed correctly, a custom approval workflow becomes an invaluable asset for NetSuite administrators and finance managers. It not only enforces business rules automatically, reducing manual intervention and error, but also provides real-time visibility into where a high-value transaction stands (who needs to approve, who has approved, and when). This transparency fosters accountability across the organization – managers cannot claim ignorance of big spends, and employees understand that significant purchases need explicit approval, aligning with a culture of compliance.
In summary, an approval workflow for high-value transactions in NetSuite ties together people, process, and technology:
-
People – defining who has authority at what levels and ensuring they’re involved at the right time.
-
Process – mapping out the approval steps and criteria, from initiation to final sign-off, including exception handling (rejections, overrides).
-
Technology – using NetSuite’s workflow tools to implement and automate the process, with controls and audit trails to back it up.
By integrating these elements, organizations can significantly reduce risk, improve efficiency, and gain confidence that large transactions – those with the most impact on the business – are properly vetted and approved before commitments are made. The result is a more controlled financial operation that can scale with the business’s growth, satisfying both internal governance needs and external audit requirements. With the guidance and examples provided in this report, NetSuite administrators and developers should be well-equipped to design and deploy custom approval workflows tailored to their company’s specific high-value transaction approval policies.
Sources:
-
NetSuite Documentation – Using Custom SuiteFlow Workflows for Approval Routing[75][76]
-
NetSuite Documentation – Custom Workflow-based Approvals for Purchases[39][77]
-
NetSuite Documentation – Supervisors, Approvers, and Approval Limits[1][2]
-
Oracle NetSuite SuiteApprovals Guide – SuiteApprovals SuiteApp Overview[17][73]
-
NetSuite SuiteFlow Workflow Tutorial – Estimate Approval Routing Workflow (Oracle Help Center)[28][35]
-
NetSuite SuiteFlow Workflow Tutorial – Designing the Estimate Approval Workflow[31][36]
-
NetSuite Help – Lock Record Action (Workflow Action documentation)[33][40]
-
Citrin Cooperman (NetSuite Partner) – NetSuite Workflows: Simplify Approval Processes with SuiteFlow[10][48]
-
Marty Zigman (Prolecto) – Sort Out NetSuite’s Options for Approval Workflows[70][44]
-
Emphorasoft – Dynamic Approval Workflows in NetSuite[4] (multi-stage vs single-stage approvals insight)
-
GURUS Solutions – Complete Guide on NetSuite Workflows[72] (workflow tips on approval fields and preventing re-entry)
-
NetSuite Help – Employee Center Approvals (Using SuiteFlow for Purchase Requests)[52][67]
-
NetSuite Help – Viewing Approval History (SuiteApprovals feature)[18]
-
Planergy Blog – Effective Strategies for Purchase Order Control (general best practice on thresholds)[7]
External Sources
About Houseblend
HouseBlend.io is a specialist NetSuite™ consultancy built for organizations that want ERP and integration projects to accelerate growth—not slow it down. Founded in Montréal in 2019, the firm has become a trusted partner for venture-backed scale-ups and global mid-market enterprises that rely on mission-critical data flows across commerce, finance and operations. HouseBlend’s mandate is simple: blend proven business process design with deep technical execution so that clients unlock the full potential of NetSuite while maintaining the agility that first made them successful.
Much of that momentum comes from founder and Managing Partner Nicolas Bean, a former Olympic-level athlete and 15-year NetSuite veteran. Bean holds a bachelor’s degree in Industrial Engineering from École Polytechnique de Montréal and is triple-certified as a NetSuite ERP Consultant, Administrator and SuiteAnalytics User. His résumé includes four end-to-end corporate turnarounds—two of them M&A exits—giving him a rare ability to translate boardroom strategy into line-of-business realities. Clients frequently cite his direct, “coach-style” leadership for keeping programs on time, on budget and firmly aligned to ROI.
End-to-end NetSuite delivery. HouseBlend’s core practice covers the full ERP life-cycle: readiness assessments, Solution Design Documents, agile implementation sprints, remediation of legacy customisations, data migration, user training and post-go-live hyper-care. Integration work is conducted by in-house developers certified on SuiteScript, SuiteTalk and RESTlets, ensuring that Shopify, Amazon, Salesforce, HubSpot and more than 100 other SaaS endpoints exchange data with NetSuite in real time. The goal is a single source of truth that collapses manual reconciliation and unlocks enterprise-wide analytics.
Managed Application Services (MAS). Once live, clients can outsource day-to-day NetSuite and Celigo® administration to HouseBlend’s MAS pod. The service delivers proactive monitoring, release-cycle regression testing, dashboard and report tuning, and 24 × 5 functional support—at a predictable monthly rate. By combining fractional architects with on-demand developers, MAS gives CFOs a scalable alternative to hiring an internal team, while guaranteeing that new NetSuite features (e.g., OAuth 2.0, AI-driven insights) are adopted securely and on schedule.
Vertical focus on digital-first brands. Although HouseBlend is platform-agnostic, the firm has carved out a reputation among e-commerce operators who run omnichannel storefronts on Shopify, BigCommerce or Amazon FBA. For these clients, the team frequently layers Celigo’s iPaaS connectors onto NetSuite to automate fulfilment, 3PL inventory sync and revenue recognition—removing the swivel-chair work that throttles scale. An in-house R&D group also publishes “blend recipes” via the company blog, sharing optimisation playbooks and KPIs that cut time-to-value for repeatable use-cases.
Methodology and culture. Projects follow a “many touch-points, zero surprises” cadence: weekly executive stand-ups, sprint demos every ten business days, and a living RAID log that keeps risk, assumptions, issues and dependencies transparent to all stakeholders. Internally, consultants pursue ongoing certification tracks and pair with senior architects in a deliberate mentorship model that sustains institutional knowledge. The result is a delivery organisation that can flex from tactical quick-wins to multi-year transformation roadmaps without compromising quality.
Why it matters. In a market where ERP initiatives have historically been synonymous with cost overruns, HouseBlend is reframing NetSuite as a growth asset. Whether preparing a VC-backed retailer for its next funding round or rationalising processes after acquisition, the firm delivers the technical depth, operational discipline and business empathy required to make complex integrations invisible—and powerful—for the people who depend on them every day.
DISCLAIMER
This document is provided for informational purposes only. No representations or warranties are made regarding the accuracy, completeness, or reliability of its contents. Any use of this information is at your own risk. Houseblend shall not be liable for any damages arising from the use of this document. This content may include material generated with assistance from artificial intelligence tools, which may contain errors or inaccuracies. Readers should verify critical information independently. All product names, trademarks, and registered trademarks mentioned are property of their respective owners and are used for identification purposes only. Use of these names does not imply endorsement. This document does not constitute professional or legal advice. For specific guidance related to your needs, please consult qualified professionals.